10. Figures
Figures
It's important to respect copyright and attribution on the web. When you use someone else's work, you need to give the author credit. With that in mind, for this exercise you're going to create an image with a caption underneath. I want you to give credit to the image's photographer by attributing them in the image's caption and providing a link to the source material.
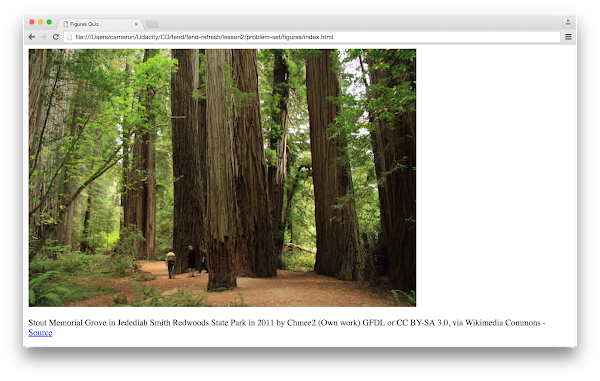
This is what it should look like in your browser:

Notice, in the image above, that there is a link to the source in the caption below the image.
How to Complete this Exercise
For this exercise, you need to edit index.html so that the caption displays below the image. I want you to use a relative path to the image, which is going to be in the same directory as index.html. Remember, a relative path points to the file from the current directory - it does not start with the root. (Your relative path should not start with /, file://, C:\, or http://).
I want you to:
- Create a
<figure>element
- Add an
<img>element whosesrcattribute points to the provided image (look in the Workspace's sidebar for the "redwoods_state_park.jpg" image!) - Add an
altattribute to the image - Add a
<figcaption>element with the text for the image's caption - Change the Markdown code to a real HTML link
Hint: If you get stuck, I recommend checking out the figure element on MDN.
Workspace
This section contains either a workspace (it can be a Jupyter Notebook workspace or an online code editor work space, etc.) and it cannot be automatically downloaded to be generated here. Please access the classroom with your account and manually download the workspace to your local machine. Note that for some courses, Udacity upload the workspace files onto https://github.com/udacity, so you may be able to download them there.
Workspace Information:
- Default file path:
- Workspace type: html-live
- Opened files (when workspace is loaded): n/a